Retopology rebuilds a dense sculpt or scan as a clean, lightweight mesh with good edge flow. It is needed whenever a model has to be animated, textured efficiently or run in real time. The detail of the original is kept by baking it into normal and displacement maps.
If you do it yourself, our Null Labs tool Null Game Toolkit generates UCX collision meshes and LODs in Blender and batch-exports game-ready FBX.
Retopology is the art of refining 3D models, transforming them from high-resolution, messy sculpts into clean, animation-ready assets. Whether you’re a seasoned 3D artist or just starting out, mastering retopology is essential for creating professional-quality models. In this step-by-step guide, we’ll explore the process of retopology and provide practical tips to help you achieve top-notch results.
What is Retopology?
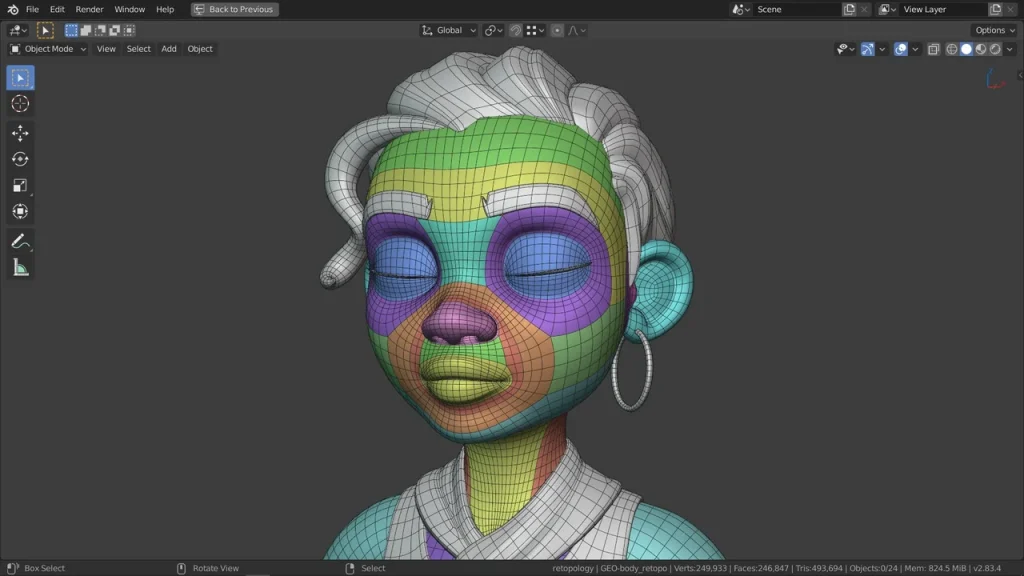
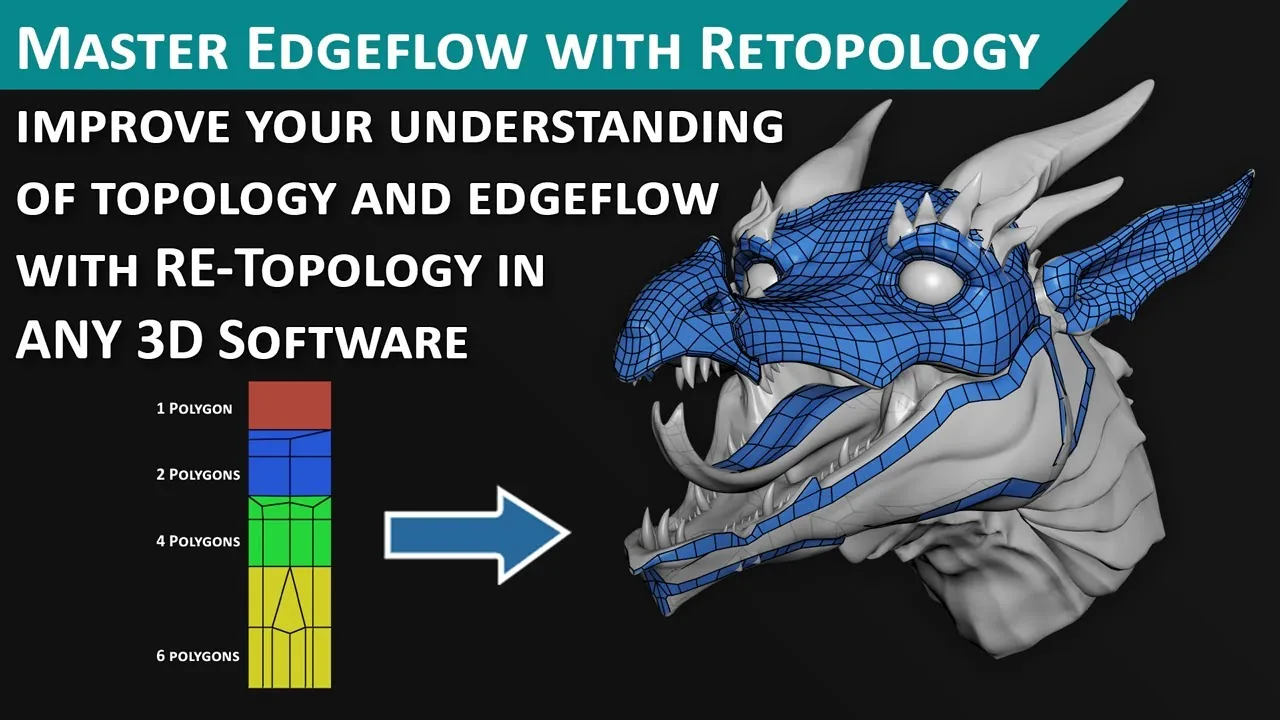
Retopology involves creating a new, optimized mesh over an existing 3D model. The goal is to achieve clean topology—well-organized edge loops and evenly distributed polygons. Why is this important? Here are a few reasons:

- Animation-Ready Models: Clean topology ensures that your model deforms smoothly during animation. Rigging and skinning become easier when your mesh follows natural muscle and joint movements.
- Efficient Rendering: High-poly models are resource-intensive. Retopologizing reduces polygon count while maintaining visual quality, making rendering faster and more efficient.
- Game Assets: For real-time applications like video games, retopology is crucial. Low-poly models with optimized topology improve performance without sacrificing visual appeal.
The Retopology Workflow
Let’s dive into the step-by-step process of retopology:
- Assess Your Model:
- Examine your high-resolution sculpt. Identify areas with excessive detail, uneven polygons, and messy topology.
- Decide which parts need Retopologizing.
- Create a New Mesh:
- Start with a low-poly base mesh. You can create this in your 3D software or use existing primitives.
- Align the base mesh with the high-resolution sculpt.
- Edge Flow and Loops:
- Plan your edge loops. Think about how they’ll follow muscle structure and facial features.
- Use tools like the knife tool or edge slide to create clean loops.
- Retopologize Section by Section:
- Focus on one area at a time. For characters, start with the head, then move to the torso, limbs, etc.
- Use snapping tools to align vertices to the high-res model.
- Maintain Consistent Density:
- Aim for even polygon distribution. Avoid dense areas next to sparse ones.
- Use edge loops to control density where needed (e.g., joints).
- Topology Tools:
- Most 3D software offers retopology tools. Learn to use them effectively.
- Blender has the “Retopoflow” add-on, while Maya has the “Quad Draw” tool.
- Check for Artifacts:
- Inspect your retopologized mesh. Look for pinching, overlapping vertices, or stretched polygons.
- Adjust as needed.
- UV Unwrapping:
- Before finalizing, unwrap your retopologized mesh for texturing.
- Create UV maps that minimize distortion.
- Test Rigging and Deformation:
- Rig your model and test deformations. Ensure it moves naturally.
- Make adjustments if necessary.
- Finalize and Bake Maps:
- Bake normal maps, displacement maps, and other texture maps from the high-res sculpt to the retopologized mesh.
- These maps add fine details without increasing polygon count.

Retopology Tools
Retopology can be streamlined significantly with the right tools, and most major 3D software packages come equipped with specialized retopology tools. Here are some of the most popular ones:
Blender’s Retopo flow:
Blender offers a powerful add-on called Retopo flow, which is specifically designed for retopology tasks. Retopoflow provides a suite of tools that allow you to create clean topology with ease. Key features include the Poly Strips tool for drawing new topology directly onto your high-resolution model and the Contours tool for creating edge loops around cylindrical parts like limbs.
Maya’s Quad Draw:
Maya’s Quad Draw tool, found within the Modeling Toolkit, is another highly regarded tool for retopology. Quad Draw allows you to draw new polygons directly onto the surface of your high-resolution model. It also includes features like Relax and Tweak for fine-tuning your mesh, and the ability to create edge loops and patches quickly.
3DCoat’s Autopo:
3DCoat offers the Autopo tool, which can automatically generate topology based on your settings. This is particularly useful for quickly creating a base mesh that can then be refined manually. Autopo allows you to specify the desired poly count and guides for important edge flows.
ZBrush’s ZRemesher:
ZBrush’s ZRemesher is a robust retopology tool that can automatically create a clean, low-poly version of your high-resolution sculpt. It provides options for maintaining edge loops and polygon distribution, and it’s highly customizable with settings to control the flow of geometry.
Modo’s Topology Pen:
Modo offers the Topology Pen, a versatile tool for drawing new topology over existing models. It includes features for snapping vertices to the surface, creating edge loops, and adjusting the mesh with ease. The Topology Pen is known for its intuitive workflow and flexibility.
When do you need retopology?
You need retopology whenever a dense mesh has to deform, be textured efficiently, or run in real time. If a model will only ever appear in a still render and never moves, a decimated or remeshed version is often enough.
- Sculpts (ZBrush, Blender sculpt) heading into animation or a game engine.
- Photogrammetry and 3D scans, which come out as millions of uneven triangles.
- CAD exports (STEP, IGES) converted to polygons, which produce long thin triangles that shade badly.
- AI-generated meshes, which usually have no usable edge flow or UVs.
Manual vs automatic retopology
Automatic tools (ZRemesher, Quad Remesher, 3DCoat Autopo, Blender’s Remesh) are fast and fine for hard-surface props, background assets and base meshes. Manual retopology is still the safer choice for faces, hands and anything that bends, because only a person can place edge loops where the shot or animation needs them.
Most production work mixes both: auto-retopo for a first pass, then manual fixes around the eyes, mouth, shoulders, elbows and knees.
How to retopologize a 3D scan or AI-generated model
Treat it like a sculpt with extra cleanup. Close holes and remove floating geometry first, run an automatic pass to get a quad base, then redraw the deforming areas by hand. Bake normals and color from the original mesh onto the new one, and check the bake for projection errors where the old surface was noisy.
Retopology best practices
- Use quads wherever the mesh deforms; triangles are fine on flat, rigid areas and are what game engines use at runtime anyway.
- Put edge loops around joints, eyes and mouth, and follow the direction the surface will bend.
- Keep poles (vertices with 3 or 5+ edges) away from areas that deform heavily.
- Spend polygons on the silhouette; flat surfaces can be carried by the normal map.
- Set the polygon budget from the target platform and camera distance before you start, not after.
Practice Makes Perfect
Retopology is both technical and artistic. It requires practice and patience. As you gain experience, you’ll develop an eye for clean topology and efficient edge flow. So keep refining those models, and soon you’ll master the art of retopology!