In the fascinating world of 3D modeling, retopology plays a crucial role in transforming complex, high-resolution sculpts into efficient, animation-ready models. Whether you’re a seasoned 3D artist or just starting out, understanding retopology is essential for achieving professional-quality results. Let’s dive into the process, explore techniques, and discover the tools that make retopology a powerful skill.
What is Retopology?
At its core, retopology involves creating a new, optimized mesh over an existing 3D model. The goal is to achieve clean topology—a well-organized arrangement of vertices, edges, and faces. Why does this matter? Here are some reasons:
- Efficient Animation: Clean topology ensures that your model deforms smoothly during animation. Rigging and skinning become easier when your mesh follows natural muscle and joint movements.
- Resource Optimization: High-poly models are resource-intensive. Retopologizing reduces polygon count while maintaining visual quality, making rendering faster and more efficient.
- Game Assets: For real-time applications like video games, low-poly models with optimized topology improve performance without sacrificing visual appeal.
The Retopology Workflow
Let’s break down the retopology process step by step:
- Assess Your Model:
- Examine your high-resolution sculpt. Identify areas with excessive detail, uneven polygons, and messy topology.
- Decide which parts need retopologizing.
- Create a New Mesh:
- Start with a low-poly base mesh. You can create this in your 3D software or use existing primitives.
- Align the base mesh with the high-resolution sculpt.
- Edge Flow and Loops:
- Plan your edge loops. Think about how they’ll follow muscle structure and facial features.
- Use tools like the knife tool or edge slide to create clean loops.
- Retopologize Section by Section:
- Focus on one area at a time. For characters, start with the head, then move to the torso, limbs, etc.
- Use snapping tools to align vertices to the high-res model.
- Maintain Consistent Density:
- Aim for even polygon distribution. Avoid dense areas next to sparse ones.
- Use edge loops to control density where needed (e.g., joints).
- Topology Tools:
- Most 3D software offers retopology tools. Learn to use them effectively.
- Blender has the “Retopoflow” add-on, while Maya has the “Quad Draw” tool.
- Check for Artifacts:
- Inspect your retopologized mesh. Look for pinching, overlapping vertices, or stretched polygons.
- Adjust as needed.
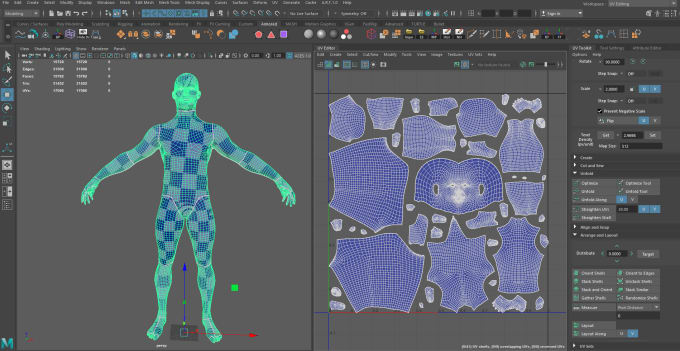
- UV Unwrapping:
- Before finalizing, unwrap your retopologized mesh for texturing.
- Create UV maps that minimize distortion.
- Test Rigging and Deformation:
- Rig your model and test deformations. Ensure it moves naturally.
- Make adjustments if necessary.
- Finalize and Bake Maps:
- Bake normal maps, displacement maps, and other texture maps from the high-res sculpt to the retopologized mesh.
- These maps add fine details without increasing polygon count.
Practice Makes Perfect
Retopology is both technical and artistic. It requires practice and patience. As you gain experience, you’ll develop an eye for clean topology and efficient edge flow. So keep refining those models, and soon you’ll master the art of retopology!


